Summary
The practice of making clay beads dates back to the Neolithic period, and their use spans numerous ancient civilizations, from Mesopotamia to various African cultures, where they were not only decorative but also held significant social, cultural, and economic value.
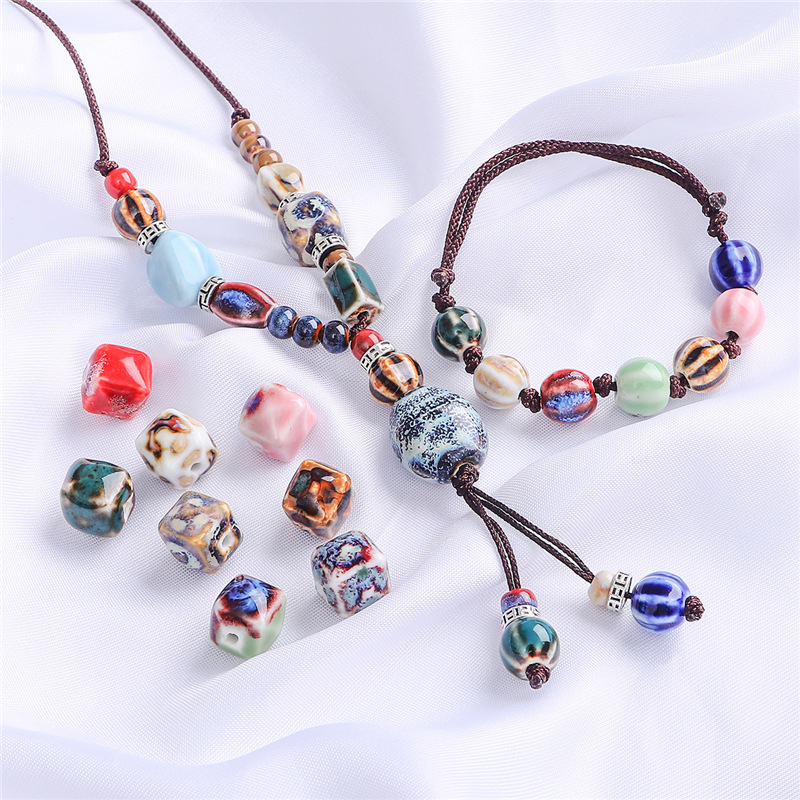
Today, crafting clay bead bracelets has become a favorite pastime for many, thanks to the versatility and affordability of polymer clay. Essential materials for this hobby include polymer clay, a work surface, craft knives, rollers, and various tools for making holes and adding textures. Popular brands of polymer clay, such as Sculpey Premo, Fimo Professional, and Kato Polyclay, are preferred for their quality and range of colors. The process involves conditioning and shaping the clay, baking it to harden the beads, and finishing with sanding and polishing techniques to achieve professional results. A variety of techniques are employed to create unique designs, including wire wrapping and incorporating specialty beads like crystals for added flair. Experimenting with different textures, finishes, and color combinations further allows crafters to personalize their creations. Beginners are encouraged to start with simple projects such as stretch bracelets and gradually explore more complex patterns and methods as they gain confidence and skill. Mastery of these techniques not only results in beautiful jewelry but also provides a fulfilling creative outlet. Despite its enjoyable nature, the process of making clay bead bracelets requires careful attention to detail and safety. Proper conditioning of the clay, accurate baking temperatures, and thorough sanding are essential to prevent common issues such as cracking or uneven holes. Safety considerations include working in a clean environment, avoiding harsh chemicals, and ensuring proper ventilation during the baking process. With the right preparation and techniques, DIY clay bead bracelet making can be a safe, enjoyable, and deeply satisfying craft.
Historical and Cultural Context
Clay beads have been a significant part of human culture and artistic expression for thousands of years. The genesis of clay bead making dates back to the Neolithic period when humans began to settle in communities and engage in agriculture. This new way of life allowed for the development of various crafts, including pottery and bead making. Clay, being easily moldable and abundant, became a primary material for these early artisans. The beads they created were simple in form, yet they marked the beginning of a journey that would see the humble clay bead adorn the bodies and garments of people across different ages and civilizations
. In the ancient Near East, clay beads were a common find in archaeological sites, indicating their widespread use in personal ornamentation. These early beads varied in size, shape, and design, reflecting the diversity of cultures in the region. In Mesopotamia, one of the cradles of civilization, clay beads were often fashioned into cylindrical or disc shapes and sometimes bore intricate designs. They were used not only for adornment but also for trade, serving as a form of proto-currency in an era long before the advent of coinage. The use of clay beads extended into the ancient African continent as well, where they played a crucial role in social and cultural expressions. In cultures across Africa, clay beads were used not only as personal adornment but also as symbols of status, fertility, and protection. The designs and patterns of these beads varied from region to region, each telling a story of the local customs, beliefs, and artistic traditions. As societies transitioned from pastoral and agrarian ways to a more urbanized lifestyle, the representation of status, power, and individuality through personal adornments became more significant. During this transformative era, bead making came under the patronage of kings, priests, and merchants, causing it to flourish amidst a rich cultural tapestry of patterns, colors, and exotic materials. The bead, thus, not only served as a simple decorative object but also a symbol of socio-cultural evolution, mirroring the changing dynamics of society. Today, the historical and cultural significance of clay beads is well-preserved and exhibited in various collections, such as those at the Iziko Museums of South Africa. The Iziko Anthropology Collection, for example, focuses mainly on African material culture, with special emphasis on southern Africa. With over 15,000 accessions, the collection illustrates indigenous African technologies and ways of life during the colonial and post-colonial periods. This comprehensive collection highlights how beads, among other artifacts, played a vital role in representing cultural diversity, status, and social transitions throughout history.
Materials Needed
Starting the hobby of making polymer clay beads requires a few essential supplies.
- Polymer Clay: This is the main material for bead making. Popular brands among bead makers include Sculpey Premo, Fimo Professional, and Kato Polyclay. For beginners, Sculpey Souffle is a good option due to its softer texture and matte finish. Cernit is another choice for those looking for translucent and unique colors.
- Work Surface: A ceramic tile or a plastic cutting board is recommended for working with clay. These surfaces help in keeping the clay steady while you work on it.
- Craft Knife: Essential for cutting and shaping the clay into the desired forms.
- Roller: To roll the clay into even sheets. You can use acrylic, plastic, or glass rollers, but it is preferable to avoid wood as it can stick to the clay.
- Hole-Making Tools: Tools such as an awl, a large darning needle, or toothpicks are useful for making holes in the beads.
- Baking Supplies: A baking tray and baking paper are needed for the baking process. Additionally, an oven (either conventional or toaster oven) is essential for curing the clay. It is advisable to use an oven thermometer to ensure accurate baking temperatures.
- Tools to Protect Work Surfaces: Using protective surfaces like aluminum foil, metal sheets, parchment paper, ceramic tiles, granite, or glass can prevent the clay from staining or damaging your furniture. This is especially important when working with unbaked clay.
- Additional Tools: There are various other tools that can make the bead-making process easier. These include sandpaper for finishing, needle tools for texturing, ball stylus for adding dimples or smooth ridges, and flexible tip shapers for blending pieces together. Cutting tools like dual-handled clay blades, shape cutters, and sharp scissors are also useful for achieving precise cuts and designs.
Essential Techniques
Creating beautiful clay bead bracelets requires mastering a few essential techniques that will help you achieve professional results.
Choosing the Right Tools
Using the correct tools is critical for a smooth crafting experience. Essential tools for making clay bead bracelets include pliers (round nose, chain nose, and flat nose), wire cutters, scissors, and a ruler
. For those looking to enhance their work, optional tools like a bead board, bead stopper, crimping tool, or needle can be very useful. Additionally, tools like a beading needle, sharp scissors, and a bead mat are indispensable for precise cutting and organizing your workspace.
Conditioning and Shaping Clay
Before you start shaping your beads, it is important to condition the clay. Knead the clay until it becomes soft and pliable. This can be done using your hands or a special clay rolling machine
. Once conditioned, roll the clay on a silicone mat or other smooth surfaces to create thin strips, which can then be cut into shorter lengths and rolled into “snakes” of about 2mm diameter.
Cutting and Combining Clay
To create diverse and colorful beads, chop the rolled clay snakes into small pieces, approximately 1/8 to 1/4 inch long, using a cutting tool or knife. Mix these small pieces together to evenly distribute the colors, then gather them into a flat pile
. This technique ensures your beads have a consistent and appealing appearance.
Creating Textures and Details
Using various tools, you can add intricate details and textures to your beads. For instance, metal sculpting/carving tools can be used for both sculpting and mixing clay, while a toothbrush or toothpick can create unique textures on the clay surface
. Experimenting with different tools like silicone sculpting tools, which leave no harsh marks, can also add a professional touch to your pieces.
Sanding and Finishing
After baking your clay beads, allow them to cool before handling. Use fine-grit sandpaper to smooth out any rough edges. Rinse the beads under running water to remove any dust and pat them dry
. This step ensures that your beads have a polished, professional finish and are comfortable to wear.
Incorporating Wirework
Wire wrapping is a technique that adds a touch of handmade elegance to your jewelry by showcasing individual beads as focal points. This method creates intricate links and connections, enhancing the overall design. By incorporating basic wirework into your beading repertoire, you can add structure, texture, and a unique style to every creation
. As you become more confident with these techniques, the opportunities for personalization and creativity are endless. By mastering these essential techniques, you will be well-equipped to create stunning clay bead bracelets that reflect your personal style and skill level. Gather your materials, choose the right tools, and start crafting your unique pieces today!
Step-by-Step Guide
Creating beautiful and unique clay bead bracelets involves a series of carefully executed steps, from gathering supplies to the final baking process. This guide will walk you through each step to ensure you have all the information you need to create your own stunning pieces.
Gathering Supplies
Before you begin, it’s essential to have all the necessary tools and materials.
- Polymer clay (Sculpey Premo, Fimo Professional, or Kato Polyclay are recommended; Sculpey Souffle is good for a matte texture, and Cernit offers unique, translucent colors).
- A ceramic tile or plastic cutting board.
- A craft knife.
- A roller (preferably acrylic, plastic, or glass; avoid wood).
- An awl, large darning needle, or toothpicks for making holes.
- Baking tray and baking paper.
- An oven for baking the clay.
Preparing Your Workspace
Set up a clean and organized workspace to make your crafting process smooth and enjoyable
.
- Ensure you have enough room to roll out and manipulate large chunks of clay.
- Lay out a piece of wax paper on your work surface to prevent imprints from the surface pattern on your clay beads.
- Keep your work area clear of any debris to avoid unwanted particles sticking to the clay.
Conditioning the Clay
Conditioning the clay is a crucial step that makes it easier to work with.
- Run each color of clay through a clay conditioning machine or knead it by hand until it’s soft and pliable.
- Roll out each color into long snakes.
Creating Basic Beads
Round Beads
- Place two colored snakes parallel to each other and twist them gently to form a “cane.
- Cut a piece of the cane. The larger the cut piece, the bigger your bead will be.
- Roll the piece in the palm of your hands, starting with more pressure and gradually relieving it to form a near-perfect sphere.
Square Beads
- Flatten a small piece of clay between your thumb and forefinger.
- Turn and squeeze the clay repeatedly until a six-sided shape forms.
- For sharper corners, gently press each side onto your work surface.
Oblong Beads
- Cut rectangular pieces instead of square ones from the clay log.
- Shape the edges with your thumb and forefinger or gently push each side onto the work surface to achieve flat edges and sharp corners.
Baking Your Beads
Once your beads are shaped, it’s time to bake them. The key to successful baking is to follow the recommended temperatures and times for your specific brand of polymer clay
. Place your beads on a baking tray lined with baking paper and bake according to the clay manufacturer’s instructions to ensure they cure properly without cracking. By following these steps, you’ll be well on your way to creating stunning polymer clay bead bracelets. Enjoy the process and let your creativity shine!
Design Ideas
Essential Beading Supplies
For beginners, it’s crucial to start with the right tools and materials to ensure a smooth crafting experience. Our designers have curated a list of essential supplies that are both stylish and easy to work with. These include stretch magic elastic string, G-S hypo cement, washi tape or small binder clips, beads of your choice, crimp covers, pliers, a beading needle, a bead board, and scissors. These materials are ideal for creating your own custom jewelry with minimal hassle
.
Beginner-Friendly Projects
Starting with simple projects can help build confidence and skill. Easy projects like stretch bracelets and beaded daisy bracelets are perfect for beginners. These designs only require basic supplies such as elastic, adhesive, and beads. You can create colorful and unique pieces by mixing different colors or adding charms to the center of the daisies. These projects are not only fun but also a great way to explore your creativity
.
Experimenting with Techniques and Patterns
As you gain more experience, experimenting with different techniques can elevate your beading skills. Techniques such as wire wrapping, knotting, weaving, or braiding allow you to create diverse structures and designs. Additionally, playing with different patterns—symmetrical, asymmetrical, random, or repeating—can give your creations unique rhythms and flows. Inspiration can come from various sources, including books, magazines, websites, blogs, and tutorials
.
Exploring Texture and Finish
Texture and finish are vital components that add depth and dimension to your beadwork. Consider integrating beads with varying textures to create dynamic surfaces. Experiment with metallic finishes to introduce a polished and luxurious element to your designs. The right combination of texture and finish ensures that your jewelry is visually engaging from every angle
.
Utilizing Color
Color plays a significant role in setting the tone and evoking emotions in your designs.
- Complementary Colors: These sit opposite each other on the color wheel and create a vibrant and energetic look.
- Analogous Colors: These are adjacent on the color wheel and offer a harmonious and soothing palette.
- Monochromatic Schemes: Stick to variations of a single color for a sophisticated and elegant appearance. Using tools like Adobe Color CC can help you create personalized color palettes by selecting colors from images. Pinterest and Design Seeds are also excellent resources for finding color inspiration, offering a variety of palettes organized by season, mood, or type.
Customizing with Specialty Beads
Don’t shy away from incorporating specialty beads such as crystals or polymer clay beads to bring a unique and personal touch to your creations. These beads provide opportunities for customization and individual expression, allowing you to tailor your designs to your style or the preferences of the intended wearer
. Embrace the learning process and enjoy the journey of creating beautiful, custom bead jewelry. Happy beading!
Tips and Tricks
Creating stunning clay bead bracelets involves a mix of preparation, technique, and creativity.
Preparation and Conditioning
First, prepare your work surface meticulously. Polymer clay is extremely sensitive to dirt and surface roughness. Line your workspace with a clean, white sheet of paper to ensure a slick and dirt-free environment, which can be easily replaced if it becomes covered in clay
. Conditioning the clay is equally important. Flatten a small piece of clay by squeezing it between your thumb and forefinger, turning and squeezing until you form a six-sided shape resembling a dice. For more precise edges, press the clay onto your work surface with your thumb, turning and pressing each side to achieve sharper corners.
Baking Polymer Clay Beads
Once you have shaped your beads, bake them at a low temperature as per the recommended baking time. If your packaging does not provide specific instructions, a good starting point is 275 degrees Fahrenheit (135C) for 15 to 20 minutes per ¼” (6.3 mm) thickness
. To prevent the beads from squashing flat, consider suspending them on wires across the edge of your baking tray.
Finishing and Threading the Beads
After baking, you might notice fingerprints or blemishes on your beads. These can be removed with wet sandpaper; remember to wear a mask to minimize dust inhalation
. For creating teardrop shapes without a mold, roll the clay into a cylinder, cut pieces to size, and pinch one end to make it narrow, continuing to pinch and smooth until you achieve the desired shape.
Molded Beads
For specific shapes like roses or skulls, you will need a mold. Create a mold by pressing a clean, undamaged charm or bead into conditioned polymer clay. Once satisfied with the mold, bake it and wait until it is completely cool before use. Optionally, apply spray varnish to prevent the clay from sticking when dry
.
Adding Foil to Polymer Clay Beads
Incorporating foil into your clay beads adds an elegant touch. Make the bead following your chosen shape instructions, then add foil before creating the hole
. Ensure the foil is oven-safe.
Mastering Basics and Continuous Learning
Beginners should start with simple shapes and solid colors before moving on to more intricate designs or techniques like marbling
. Mistakes are part of the learning process and can lead to mastery. Continue to expand your skills by exploring advanced techniques, new projects, and keeping updated with the latest trends in beading.
Dealing with Common Issues
Tangled Threads and Uneven Spacing
Prevent thread tangles by conditioning threads before starting and using bead mats to keep beads stable
. Achieve even bead spacing by counting beads between knots and practicing consistent techniques.
Correcting Knotting Errors and Avoiding Oxidation
Carefully undo overhand knots with a needle and use pliers to adjust too-tight surgeon’s knots. To prevent oxidation of metal components, use anti-tarnish strips and clean jewelry with mild, soapy water and a soft brush
. Remember, every project is a chance to learn and grow. Each beadwork piece reflects your personality and creativity, so embrace your unique style and take pride in your creations.
Safety Considerations
When working with clay bead bracelets, it’s important to follow certain safety precautions to ensure a safe and enjoyable crafting experience.
Avoid Harsh Chemicals
Remove jewelry before swimming, showering, or applying perfumes and lotions, as harsh chemicals can damage both beads and metal components
. This is particularly important for preserving the integrity and appearance of your finished pieces.
Proper Handling and Inspection
Regularly inspect your beaded jewelry for signs of wear, loose components, or damage. Addressing these issues promptly can prevent further damage and potential injury
. When handling the beads, especially when filing and smoothing edges, use tools like a jewelry file or fine-grit sandpaper to ensure there are no sharp spots that could cause scratches or discomfort.
Safe Baking Practices
When curing and baking polymer clay beads, ensure you’re using a conventional oven, not a kiln. Polymer clay doesn’t harden until baked, and using a home oven is sufficient for this process
. Always let the beads cool down completely before handling them to avoid burns and use fine-grit sandpaper to smooth any uneven edges safely.
Work Surface Protection
Clay can get messy, so protecting your work surface is crucial. Spread out newspaper or use a plastic tablecloth to make cleaning up easier. This is especially useful when working with air-dry clay, which can be more challenging to manage than polymer clay
.
Moisture Management
When working with different types of clay, maintaining the right moisture level is essential. For example, WED clay needs to stay moist to be workable, whereas polymer clay can be left uncovered without drying out
. If taking a break, covering your project appropriately can help maintain the clay’s condition and prevent it from drying prematurely. By adhering to these safety considerations, you can ensure a safer and more pleasant crafting experience while creating your beautiful clay bead bracelets.
Troubleshooting
As you embark on your beading adventure, it’s natural to encounter a few bumps along the way. Every seasoned crafter was once a beginner, and learning from mistakes is an integral part of the creative process. This section will address some common pitfalls and provide solutions to help you troubleshoot and refine your skills.
Dealing with Tangled Threads
Tangled threads can turn a relaxing beading session into a frustrating experience.
- Prevention is Key: Before you start, ensure that your threads are properly conditioned and not prone to tangling.
- Use Bead Mats: Working on a bead mat provides a stable surface and prevents beads from rolling away.
- Organize Your Workspace: Keep your workspace tidy and organize beads in containers to minimize the risk of spills and tangles.
Fixing Uneven Bead Spacing
Once you’ve drilled your holes, you’ll need to file and smoothen the edges to remove any rough spots or burrs. This step is crucial as rough edges can be uncomfortable to wear and can even cause scratches. Use a jewelry file or needle file, gently running it back and forth over the hole until it’s smooth to the touch. Alternatively, you can use fine-grit sandpaper to smooth out the edges
.
Curing and Baking Beads
Curing and baking your clay beads is a crucial step in the process of creating unique, high-quality beads. This stage can make or break the final product, so it’s essential to get it right.
- Oven Versus Toaster Oven Baking: Experiment with scrap clay before committing to a large project. Store unused clay properly to maintain its workability.
- Troubleshooting Common Issues:
- Cracking: Usually due to under-conditioned clay or overbaking. Knead clay longer and monitor baking time.
- Fingerprints: Smooth the surface with rubbing alcohol before baking or sand after.
- Uneven Holes: Use a bead reamer after baking for clean, consistent holes.
- Color Bleeding: Avoid pressing different colors together too firmly.
Piercing Holes in Beads
Before hardening your polymer clay beads, you must pierce them to create a hole for stringing. Doing so afterward can be difficult and may result in cracking.
- Select the Right Tool: Needle tools, toothpicks, or skewers are good choices.
- Ensure Uniformity: To maintain consistent hole sizes, use the same tool for all beads.
- Support the Bead: Place your bead on a soft surface like foam or folded cardstock to prevent distortion while piercing.
- Pierce Steadily: Gently twist the tool through the bead, applying even pressure to avoid misshaping.
- Keep It Clean: Wipe the tool periodically to prevent clay buildup, which can obstruct the hole.
Additional Tips
- Rolling Pin: Used to flatten the clay before cutting it into shapes. A smooth, cylindrical object like a glass bottle can also be used in place of a rolling pin.
- Shape Cutters: These are used to cut the clay into the desired shapes for your beads.
Further Learning and Resources
Exploring the world of DIY clay bead bracelets can be immensely rewarding, and expanding your knowledge with additional resources can help elevate your craft to new heights. Whether you’re a beginner or looking to hone your skills, there are numerous tutorials, guides, and community resources available to support your creative journey.
Tutorials and Guides
To kickstart your clay bead bracelet projects, numerous comprehensive tutorials are available online. These guides often include detailed step-by-step instructions and illustrations, making it easier for you to follow along and achieve the desired results. For instance, Ginger’s well-organized and thorough tutorials on sanding and buffing polymer clay provide clear and understandable instructions that many find invaluable
. Similarly, Allie’s instructional videos on platforms like YouTube have garnered praise for helping beginners with zero experience learn and enjoy the craft from the comfort of their homes.
All-In-One Beginner Tutorials
For those who prefer a consolidated learning experience, all-in-one beginner tutorials can be especially beneficial. These tutorials typically cover a range of topics from choosing the right materials and tools to more advanced techniques such as making canes and baking polymer clay
. They are designed to speed up your learning process and help you complete a project from start to finish, providing a sense of accomplishment and boosting your confidence as you progress.
Online Communities and Forums
Joining online communities and forums can also provide valuable support and inspiration. These platforms allow you to connect with other enthusiasts, share your work, and seek advice. Engaging with a larger beading community can offer opportunities to learn from others’ experiences, get feedback on your projects, and stay updated with the latest trends and techniques
.
Shopping for Supplies
Finding the right supplies is crucial for any DIY project. Reputable suppliers like Potomac Beads offer a wide range of products including gemstones, crystals, findings, and seed beads, ensuring that you have access to high-quality materials for your creations. Potomac Beads also provides starter kits that come with everything you need, removing the guesswork from the process and allowing you to focus on crafting
.
Continuing Education
As you become more proficient, consider exploring advanced tutorials and courses to further refine your skills. Tutorials on specific techniques such as making polymer clay canes can open up new creative possibilities and even improve your chances of selling your products by creating unique and intricate designs
. Additionally, workshops and online classes led by experienced artists can provide deeper insights and personalized guidance to help you perfect your craft.
